Archive | Desserts RSS feed for this section

Raw Lemon Coconut Bars

11 Nov

I really love raw desserts.  They satisfy my sweet tooth without making me crave more.  I’m not sure how that works, but it’s one reason I’ve started experimenting with raw dessert recipes.  This recipe for lemon coconut bars is adapted from the Lemon Coconut Bars recipe in Ani Phyo’s Ani’s Raw Food Kitchen.  There’s no baking, no white sugar, no flour, and they literally take about 5 minutes to make.  I think a raspberry or cranberry sauce would be a nice accompaniment to these bars, but maybe I’ll try that next time.

Ingredients

1/2 cup walnuts

1/2 cup almonds, chopped

1 to 1 1/2 cups pitted dates (I recommend buying dates with the pits, and removing them yourself.  Dates already pitted tend to be on the dry side.)

1 vanilla bean or 1/2 tsp vanilla extract (I used vanilla extract, though the original recipe calls for a vanilla bean)

1/2 tsp sea salt

Zest of one lemon

Juice of one lemon, or about 2 tablespoons

1 cup shredded dried coconut, plus some for garnishing the bars

Preparation

First, place the walnuts and almonds in a food processor.  Pulse until the nuts are chopped.    Add the remaining ingredients to the food processor, and process until you have a paste you can press into a pie plate or 9-inch square baking pan. Press the dough into the pan, and sprinkle with shredded coconut.  Refrigerate for at least a few hours before serving.

Peanut Butter Chocolate Chip Cookies

6 Nov

This recipe is adapted from the Peanut Butter Cookies in The Healthy Hedonist by Myra Kornfeld.  I love that these cookies are made with an “alternative” flour–chickpea, not wheat.  These cookies are great to freeze.  Just microwave them for about 30-45 seconds when ready to eat.

Ingredients

1/2 cup softened butter or vegan margarine (I used Earth Balance)

1/4 cup barley malt syrup

1/2 cup brown sugar

3/4 cup organic peanut butter (chunky or smooth

1 egg (if you want to make these vegan, you can leave out the egg without any problem)

1 tsp vanilla extract

1 cup chickpea flour

1/2 tsp sea salt

1/4 tsp baking soda

1/2 cup grain-sweetened chocolate chips (I used Sunspire brand)

Preparation

Preheat oven to 350 degrees F.  Line two baking sheets with parchment paper and set aside.  Cream the butter, sugar, and barley malt together with a mixer until fluffy (2-3 minutes was enough for me).  Add the peanut butter and mix for another minute.  Beat in the egg and vanilla just until smooth.

In a medium bowl, whisk the flour, salt, and baking soda together.  Mix the dry ingredients together into the wet in three batches, mixing until just combined. Fold in the chocolate chips until evenly distributed.

Drop the dough by the tablespoonful onto the parchment-lined cookie sheets, with about 2 inches of space in between.  Bake 12-14 minutes, until the bottoms are golden.


Chia Pudding

14 Oct

This “pudding” is two basic ingredients:  chia seeds and some sort of milk.  I used almond milk, but I have also used coconut milk before–so good!  I have also added other ingredients to the basic pudding, including honey or other sweetener, cocoa powder, and dried fruit.  I’ve been eating this batch with dried cranberries and brown rice syrup.

Chia seeds are so cool.  They absorb a LOT of liquid and form a thick, gel-like substance in record time.  No cooking required!  Plus, chia seeds are amazingly good for you, as they are rich in essential fatty acids, including omega 3’s. You can find chia seeds in the bulk section of most natural foods stores or well-stocked regular grocery stores.  You can probably find them pre-packaged also, but they will probably be more expensive.  This pudding is great as a dessert, but I’ve also eaten it for breakfast.

Ingredients

1/4 cup chia seeds

2-2 1/2 cups almond milk

Preparation

Mix the chia seeds with the milk.

Cover with some foil, and refrigerate for about an hour.  If you’d like your pudding thinner, add more milk and allow the pudding to sit longer.  Don’t worry too much about adding too much to the seeds–they absorb a lot of liquid.  Serve as is, or add dried or fresh fruit (mango is good!), nuts, and/or honey or other sweetener.

Serves 4 small-ish dessert portions.

Gluten Free, No Bake Chocolate Coconut Cookies

25 Sep

I’ve made some variation of these cookies several times.  It’s basically a mix of nuts, cocoa, coconut, nut butter, dates, honey or other sweetener, and sometimes other types of dried fruit.  I’ve used different mixes of nuts and seeds, including almonds, walnuts, cashews, and sunflower seeds.  The constant is the cocoa, dates, and coconut.  The rest is flexible.  Nut butters I’ve used include tahini (made from sesame seeds), peanut butter, and almond butter.  Different sweeteners I’ve used include honey and brown rice syrup.  You need a food processor for this recipe in order to get everything to a sticky consistency that will form cookie balls.

Ingredients

About 6 large pitted dates

1/2 cup raisins

1 cup mixed nuts (this time I used almonds and walnuts)

1/3 cup almond butter

3 T tahini

1/2 cup shredded unsweetened coconut, and another 1/2 cup for coating the finished cookies

1/3 cup cocoa

1/4 cup brown rice syrup

Preparation

First, process the dates, raisins, and nuts until well combined, like the picture below:

Next, add all the other ingredients, except a 1/2 cup of coconut.

Process everything together until well combined.

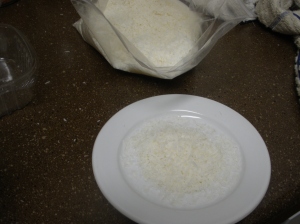
Next, remove the mixture from the food processor.  Place the coconut on a saucer or plate.  Form the mixture into equally sized cookie balls, and roll each in the coconut.  Set aside on another plate until you’re out of dough.  Store in the refrigerator or freezer in a bag or storage container.  I eat these straight out of the freezer.  The sugar from the brown rice syrup and the dates keeps these cookies from freezing hard.

Vegan Peanut Butter Cups

20 Sep

Hear me out.  You hear vegan, and think “That can’t be good!”  Well, I’m here to tell you you’re wrong.  These peanut butter cups, based off a recipe in Alicia Silverstone’s The Kind Diet, are amazingly delicious and much better than Reese’s cups.  They’re also not made with any weird processed crap like you find in commercially produced peanut butter cups.  I mostly followed Alicia’s recipe, except I did not use maple sugar as she recommends.  It’s pretty pricey, and you can either skip the sugar altogether (these are plenty sweet between the graham crackers and the chocolate anyway) or substitute natural cane sugar.  I also used a mix of almond butter and peanut butter.  I’ve put Alicia’s recipe below as it appears in her book, but I’ve included my notes in parentheses.  These are sooo good!

Ingredients

1/2 cup Earth Balance butter

3/4 cup crunchy peanut butter (Smooth is fine, and as mentioned above, I used about half almond butter here–play with different nut butters for these.  They are all delicious.  Remember to get natural nut butters–no added stuff, just nuts and maybe salt.  Period.  Regular peanut butter can have a lot of undesirable stuff in it, including high fructose corn syrup and hydrogenated oils.)

3/4 cup graham cracker crumbs or 10 graham cracker squares

1/4 cup maple sugar or other granulated sweetener (I’ve left this out before and still ended up with delicious peanut butter cups)

1 cup grain-sweetened, nondairy chocolate or carob chips (I used Sunspire brand, which are sweetened with barley malt.)

1/4 cup soy, rice, or nut milk (I used almond milk.)

1/4 cup chopped pecans, almonds, or peanuts (I used chopped walnuts.)

Preparation

Line a 12-cup muffin tin with paper liners.

Melt the butter in a small saucepan over medium heat. (While you’re melting the butter, process your graham crackers in a food processor if you have squares as opposed to crumbs.)

Stir in the peanut butter, graham cracker crumbs, and maple sugar and mix well.  Remove the mixture from the heat.  Evenly divide the mixture, approximately 2 tablespoons per cup, among the muffin cups.

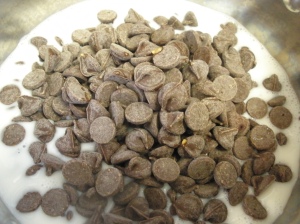
Combine the chocolate and milk in another pan.

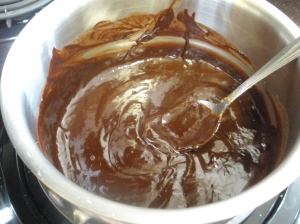
Stir over medium heat until the chocolate has melted.

Spoon the chocolate evenly over the peanut butter mixture.  Top with chopped nuts.  Place in the refrigerator to set for at least 2 hours.  (I like to put them in the freezer if I want them to be ready faster!)

Raw Apple Pie

18 Sep

I’ve been experimenting with raw foods lately, and I’m having a great time in the process.  I recently got a lovely Breville juicer for my birthday (thanks Mom!), and have upped my intake of fresh salads.  I’ve also started making raw dishes like zucchini pasta with raw tomato sauce and raw desserts.  Raw desserts are especially fabulous.  Essentially, they are a fruit and nut blend.  A few weeks ago I made a raw chocolate pie, with a date/walnut/coconut crust, and a filling of mashed avocado with good cocoa powder (not raw, but I’m not concerned with things being 100 percent raw anyway) and honey.  This raw apple pie follows basically that same formula for crust–dates and walnuts blended in the food processor for a crumbly paste that spreads well in the bottom of a pie plate or tart pan.  The filling is just apples with a date syrup to sweeten, along with orange zest and juice to add flavor and keep the apples from turning brown.  I also added dried cranberries and golden raisins for extra sweetness and flavor.  I did not allow the apples to sit and drain, but I do include this step in the recipe.  The apples release a significant amount of water, and you can end up with a pie that’s on the soupy side.  That’s what happened to me, though the pie was still very, very tasty!

For the crust:

Ingredients

5-6 large medjool dates, pitted (It’s better to use dates that still have pits because they tend to be softer.  Pitted dates can be pretty dry.)

2/3-3/4 cup raw walnuts

Preparation

Place dates and walnuts in your food processor.  Process until you have a crumbly mixture.  The mixture should hold together but not be too sticky either.  Press the mixture into an 8 inch pie plate or a tart pan (as pictured above).  Evenly distribute, pressing into the edges so the mixture is about halfway up the side.

For the filling:

Ingredients

3 medium to large apples (I used Braeburn, but any variety will do)

Juice and zest of 2 oranges or tangerines

1 1/2 teaspoons cinnamon

2/3 cup dried cranberries and/or raisins or golden raisins

3 dates, pits removed

1/3 cup water

Preparation

Slice the apples into thin slices.  Place in a bowl with orange juice and zest.

Cover, and refrigerate for about 2 hours to allow the apples to release some of their liquid.  Next, place the dates and water in your food processor, and blend until you have a syrup.

Drain the apples, and add the syrup and the dried fruit.  Place the apple mixture in the pie plate or tart pan, evenly distributing.  Arrange the apples into a pattern if you like (I didn’t make a lot of effort at this, but feel free.)  Slice and serve.

Chocolate Lovers’ Brownies

13 May

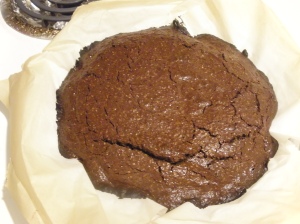
This brownie recipe is my new favorite, and from one of my absolute favorite cookbooks, The Healthy Hedonist by Myra Kornfeld.  What I love about it is that it’s so incredibly chocolaty, and is made with oat flour instead of wheat.  Who doesn’t love oats and chocolate together?  If you crave chocolate, this is the brownie for you.  My recipe is not a word for word copy of Myra’s, but it’s pretty close.  I put my own twists on this recipe…for example, I use 100 percent cocoa chocolate instead of bittersweet, and I use brown rice syrup instead of maple syrup.

Ingredients

4 ounce bar of Ghiradelli or similar bittersweet chocolate, or 100 percent cocoa chocolate (found in the baking section of good stores)

1 stick unsalted butter

3 eggs

2 tsps. vanilla extract

1 cup evaporated cane sugar

1/4 cup brown rice syrup or maple syrup

1/2 tsp salt

1 1/4 cup oat flour (can be purchased as flour, but you can also grind oats yourself using a blender or food processor)

1 cup chopped walnuts (I did not use walnuts this time, but I usually do)

Instructions

Heat oven to 350 degrees.  Line a pie plate or 8×8 baking pan with parchment paper or aluminum foil.

If making oat flour, place about 1 1/2 cups of rolled oats in a food processor or blender.  Process until they have a flour-like consistency.  The oat flour can be a little coarser than wheat flour–that’s fine.  No need to be too fine.

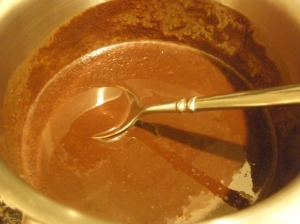
Combine the chocolate and butter in a small saucepan and heat over medium heat until the chocolate melts.  Stir the combine the butter and chocolate with a whisk to combine.

Whisk the eggs and vanilla together in a large bowl, and then whisk in the chocolate and butter mixture.  Combine thoroughly.  Add the brown rice syrup, cane sugar, salt, flour, and walnuts.  Mix with a wooden spoon or large metal spoon.

Pour the batter into the pie plate or baking pan.  Bake for about 30 minutes, until the center is still soft (fork comes out with batter on it) but the sides are completely done.  Don’t over-bake, or you’ll have dry brownies.

Strawberry Sorbet

8 May

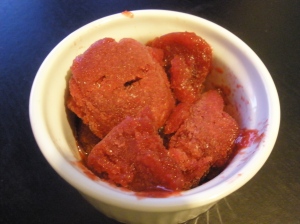
One of the great things I discovered while looking for things to do with my boatload of strawberries is that you don’t actually need an ice cream maker to make sorbet.  The results are great, and I can’t wait to try other fruits-blackberries and peaches later in the summer!  This recipe is very simple ingredient-wise, and just takes a bit of time to pull off.  You won’t regret the investment, I promise.

Ingredients

3 cups washed and stemmed strawberries

Juice of half a lemon

1/4 cup water

1/4 cup sugar

Instructions

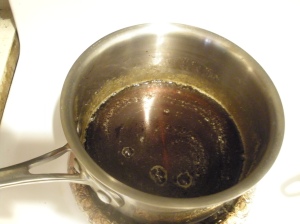
First, make the simple syrup.  Combine the sugar and the water in a small pan over medium high heat.  Bring to a gentle boil, turn the heat down to medium, and cook until the sugar is completely dissolved, stirring occasionally.  My syrup is brown because I used a natural cane sugar.  Also, I made more than I needed for the sorbet to use for other purposes (good for cold drinks that need to be sweetened-like iced coffees).

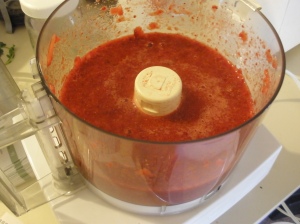
Next, place strawberries in a food processor with the simple syrup and lemon juice.  Process well.

Pour in a glass baking dish and place in the freezer for about a half hour.  (As you’ll notice, I used a metal bowl. As it turned out, metal greatly prolongs the freezing process, so I recommend a different type of container.)  Remove and stir the mixture.  Return to the freezer, and repeat this step until the sorbet is of “sorbet consistency”–frozen, just not rock solid.  Because of the sugar, the sorbet probably will not freeze hard anyway.

I particularly enjoyed eating this with whipped cream, but it’s great all by itself too.

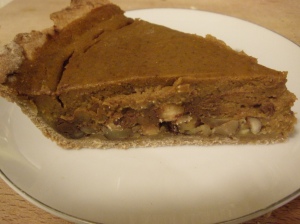
Pumpkin Pie with Hazelnuts and Chocolate

6 Dec

This recipe combines Martha Stewart’s pie crust recipe, pumpkin pie filling from a Heidi Swanson recipe on http://www.101cookbooks.com, and my own addition of a hazelnut chunk and chocolate layer on the bottom of the pie.  This was an excellent way to round out our Thanksgiving meal.  For the pie crust, I employed the help of my food processor to mix the dough–it worked very nicely, but you can make the dough with a pastry blender or even a fork. Though this is the crust I used, feel free to buy a pre-made crust or use any recipe you like.  Martha’s recipe has always given me excellent results.

Martha’s Pie Crust

Makes enough dough for two crusts, or a top and bottom crust for one pie.

Ingredients

2 1/2 cups white whole wheat flour, or unbleached white flour

1 tsp salt

1 tsp sugar

1 cup unsalted butter, cut into 1 tablespoon pieces (make sure it’s very cold)

1/4 cup-1/2 cup ice water

Preparation

Put flour, sugar, and salt in the food processor, and pulse a few times to combine.  Add the butter and run the processor until the dough looks grainy–the butter and flour are completely combined.  As you pulse, add the ice water little by little.  The dough should stick together now and not be grainy–the water should be enough to bind everything together.  Form the dough into two equally-sized balls with your hands.  Store one for later use.  Refrigerate the dough you will use for the pumpkin pie until you are ready to put together the pie.  What you don’t want is for the dough to get warm…the butter should not melt.  Bad!

Pumpkin Pie with Hazelnuts and Chocolate

1 pie crust

1 1/2 cups hazelnuts, toasted (instructions below on how to toast)

1/2 cup brown sugar

1 tsp cinnamon

1/2 tsp cloves

1/2 tsp allspice

1 tsp ground ginger

(or, instead of each spice individually, use 1 tablespoon of pumpkin pie spice)

1 tsp sea salt

1 tablespoon arrowroot powder (you can find arrowroot in the bulk foods section of most stores, or you can substitute cornstarch)

1 can pumpkin puree (do NOT use pumpkin pie mix….you want pure, plain pumpkin puree)

1 tsp vanilla extract

3 eggs

1 cup coconut milk (you can buy a half-size can of coconut milk that equals about 1 cup; otherwise, buy the big can and freeze the other half of it if you don’t have a use for it right away)

1 cup semi-sweet chocolate chips

Preparation

Preheat oven to 350 degrees.  Place the hazelnuts in a small baking dish, and toast for about 10 minutes.

Set aside the hazelnuts.  Prepare the pie filling.  Mix the brown sugar, spices, salt, and arrowroot in a large mixing bowl. Once combined, add pumpkin puree and vanilla.  Then, add eggs and coconut milk.
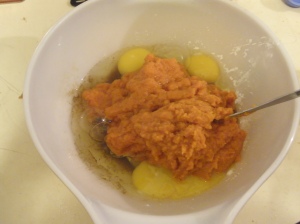
It is easiest to use an electric mixer, but a whisk will also work.

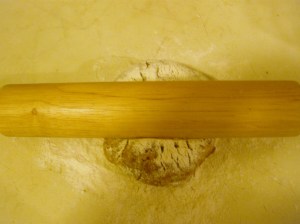
Next, roll out the dough on a floured work surface.
Next, place the crust in a pie pan.  Trim the edges.  I used the excess to make a few tiny pies with leftover pie filling.

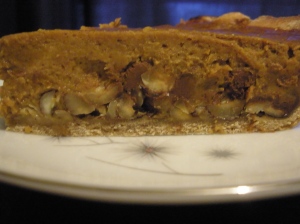
Next, add the hazelnuts and chocolate chips to the bottom of the crust.  Lightly chop the hazelnuts first if you like. 

Next, pour the pie filling over the crust.  I had a bit left over, which I used to make tiny pies in small ramekins (see pictures that follow).

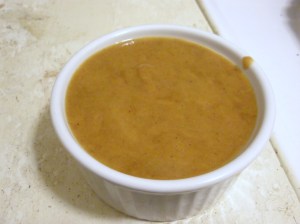
Bake the pie for about 40 minutes, then check.  Stick a knife in the center, and if it comes out clean, the pie is done.  The pie may take up to 50 minutes, but my oven seems to cook things faster.  My small pies had to come out after about 30 minutes.
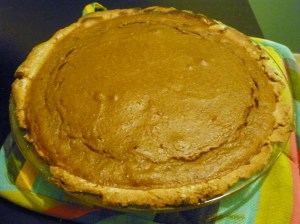
I made one small pie with just the filling, and the other with crust on top and bottom.  Yum!  Though I did not serve the pie with whipped cream, that would make an excellent addition.  Not Cool Whip for god’s sake…real whipped cream!  This pie is excellent with a cup of strong coffee.

Tangerine-Infused Cranberry Sauce

5 Dec

Part of the Thanksgiving feast I made for my boyfriend and myself was cranberry sauce.  I really don’t like canned cranberry sauce….I can’t get over the congealed, can-shaped “sauce” that emerges.  So, I make my own.  Fresh cranberries are everywhere this time of year, but they won’t last long.  I usually stop seeing them in Austin stores pretty soon after the New Year.

Orange and cranberry are a natural flavor match, so I added zest from a tangerine plus the juice of the tangerine to the cranberries.  The zest, juice, cranberries, water, and sugar are the only ingredients you need.

Ingredients

1-1 pound bag fresh cranberries

Zest and juice from one tangerine or orange

2/3 cup sugar

2 cups water

Preparation

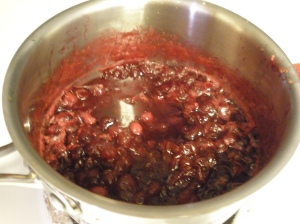
Add the cranberries, water, sugar, zest, and juice to a medium sauce pan.

Turn on high and bring to a boil.  Immediately turn heat down to medium low, and simmer for about 30 minutes, stirring every 5-7 minutes.  You’ll know the cranberries are done when they pop.  Fun!  Once the sauce is done simmering, let sit for about 15 minutes to cool and to thicken.